
We can now have a dinner party that does not require people to stand around a dinning room table.
My can I mean we should and I would like to... someday.
To begin, a few months back I these unfinished wood chairs. They are currently on sale but they were on sale even more. I think we paid $199 a set and had a discount code and free shipping. You can't beat that. Well you can if you buy chairs that come to your door ready to go and don't have 10 steps before they are usable. That is beyond the point. That was actually our first plan. I found some that I loved at Ballard Design, called to have them put on hold at the store in Tampa, we drove there & guess what? Someone came in and bought the chairs I had on hold. They felt bad (or so they said) but they were discontinued and did not have four left anywhere.
Plan B was to search and search and I could not find any that I loved more than the Ballard Chairs.
Plan C was to make some that I loved more. I tried searching vintage and thrift stores but they were all going to cost around $100 each and required stripping or sanding then refinishing.
Plan D was to buy them ready to DIY. I already had fabric and we DIYed our benches and they turned out alright so plan D was the winner.
Four boxes arrived at our door with bags of hardware but the quality was great. Geoff bought a spray gun that we have used many times and went to work.


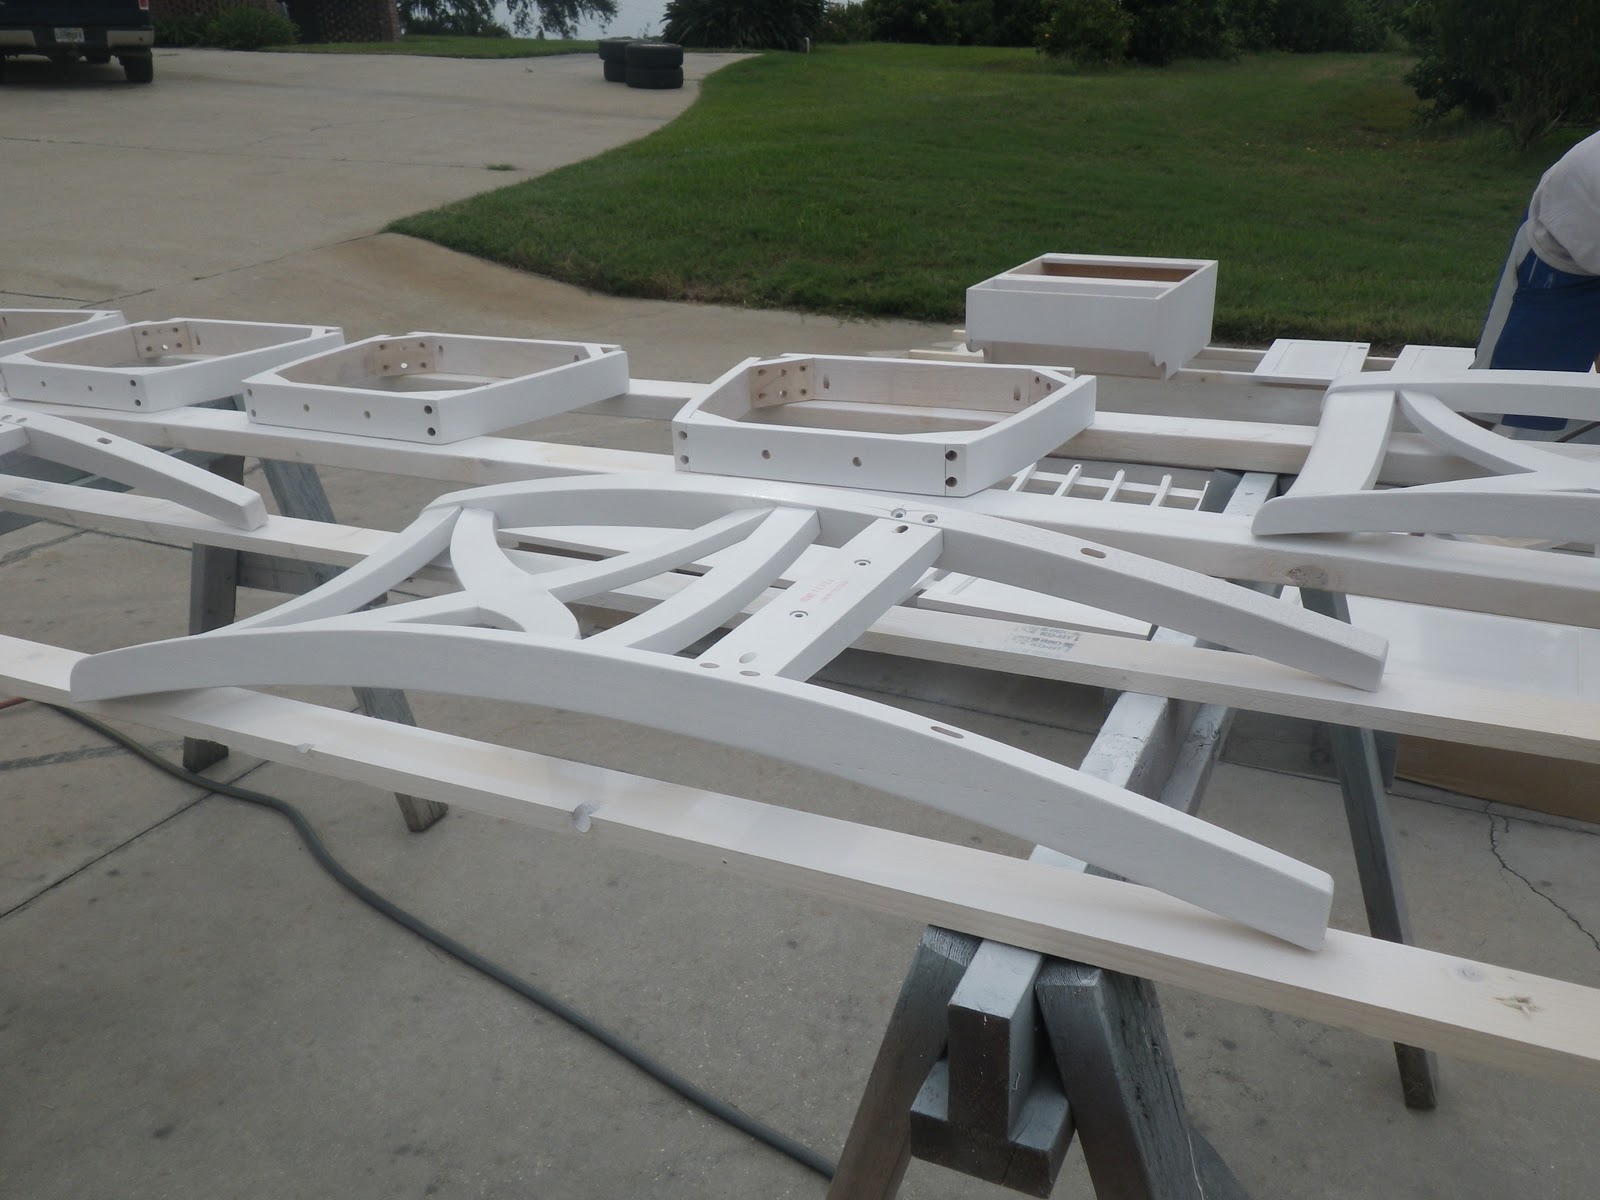
After laying everything out of saw horses at your parents house, while they are out of town.... the fun work begins.
These chairs came ready to prime but you must first wipe them down with a wet rag. This will remove any dust or dirt that has accumulated (while sitting in the closet for a few months). Your rag should be fairly wet but not dripping.

After they dry, which will be by the time you finish, you are ready to prime. Be sure to follow whatever directions that have come with your spray gun or if you use spray paint that saves the step of watering down the paint. Be sure to ask your paint pros at the store want paint they recommend for the type of wood you are painting. There is a de-yellowing primer that we have never used but should have on a few projects. This primer is supposed to prevent the softer, darker wood from yellowing through your paint.

Geoff painted because it was Geoff's spray gun. He bought me one a few months ago that I still haven't had an opportunity to use. I think that was the point.

Once they were painting, we let them dry over night. We moved them into the covered barn to prevent dew from forming.
Before painting the two coats of actual paint, there are a few steps to follow.
- Use steel wool to lightly rough up the primer
- If you are using a compressor and spray gun, blow the chairs clean
- Be sure to wipe down the chairs again
For paint, we chose to go with Behr Premium Plus Ultra Pure White Interior Flat Enamel. Its scrub able. We used this paint on our dresser and have had great results being able to clean it.

Geoff painted two coats on the chairs. A good hint is to be sure you paint the backs first. Even if you let them dry for a long time there is still a chance of them sticking.

Be sure to let them dry again over night before you try to assemble them. This time we brought them inside to prevent dirt or dew.
Geoff surprised me by putting the chairs together during his lunch break. He said they took about an hour but this included eating lunch and watching the weather...

A few months back, I went to a fabric store and fell in love with a few fabrics. The first fabric I turned into my benches, the second is destined to be pillows and the third is to cover these chairs. Perfect.

I had two yards of fabric and was able to cut off a foot from each end. I then layed the cushions down and cut four squares. I decided that I didn't want to have the same pattern on each chair for fear of them not coming out perfect. I did want them to all have the pattern vertical because of the "wood grain" pattern.

The fabric looks really shinny in this picture. It isn't, I promise. Geoff then screwed the cushions down so they wouldn't move. If we ever want to put new fabric on we will just have to unscrew them. I hope we don't for a long time. Even though it only took about 10 minutes a chair to recover it took some time. The recovering process just involved me holding the fabric and Geoff using a staple gun. No sewing required.

We made four. Three really only fit at the table but you can make four work if you have to. For now we are using the fourth at the computer desk.

I love the fabric and the shape of the chairs. Do they look homemade? Slightly, yes but they make me happy.
Cost break down?
- Two sets of chairs at $199 a set (no tax or shipping)
- Fabric $10 for two yards (still have enough left to make a pillow or two)
- Paint $14 for a quart
- Primmer, spray gun, fiance already owned
Not bad.
There was three more projects that day that I have to finish & then I get to share!
.live creatively well.
-nicole
No comments:
Post a Comment